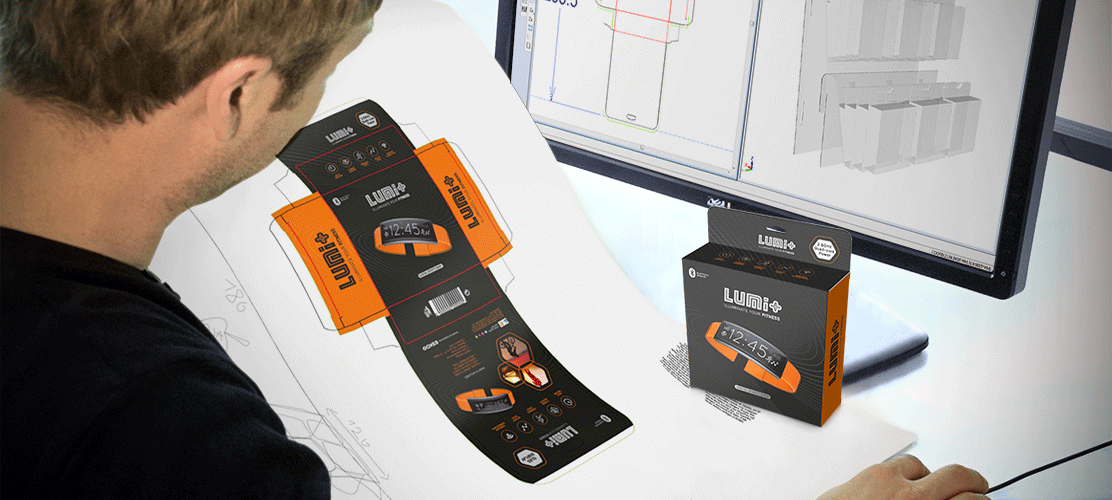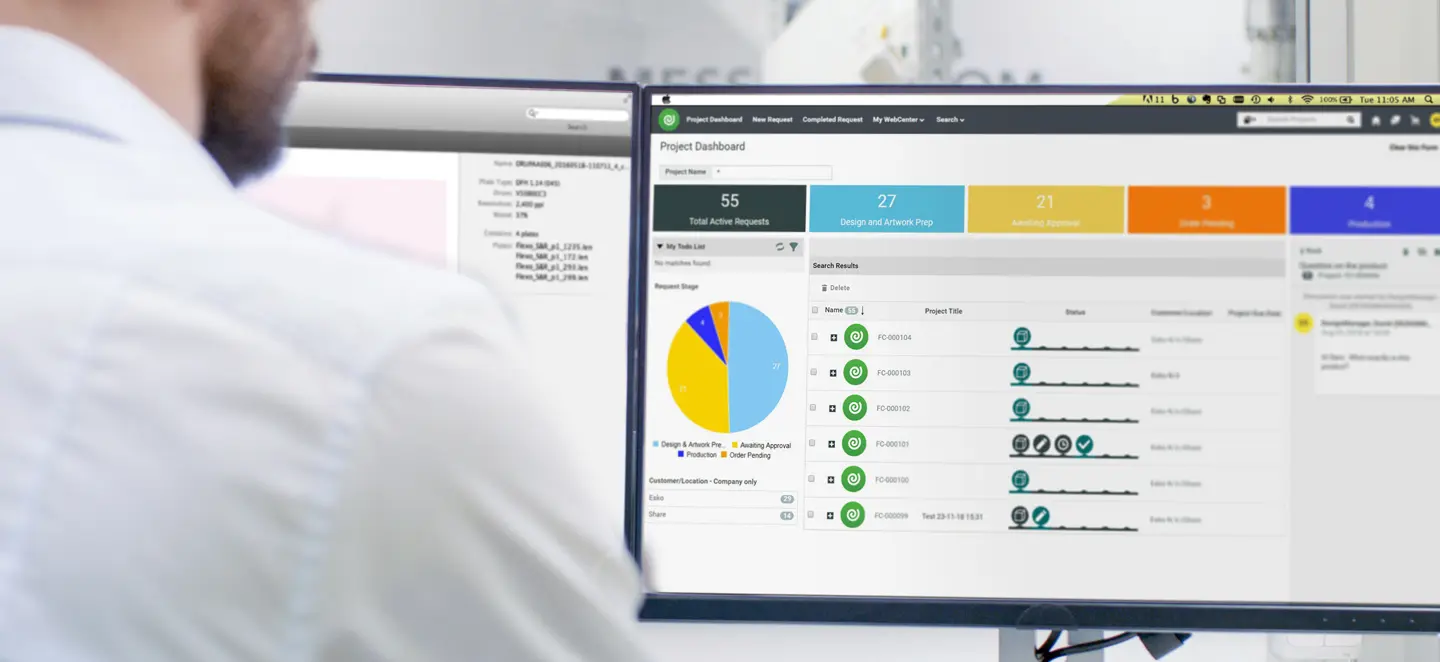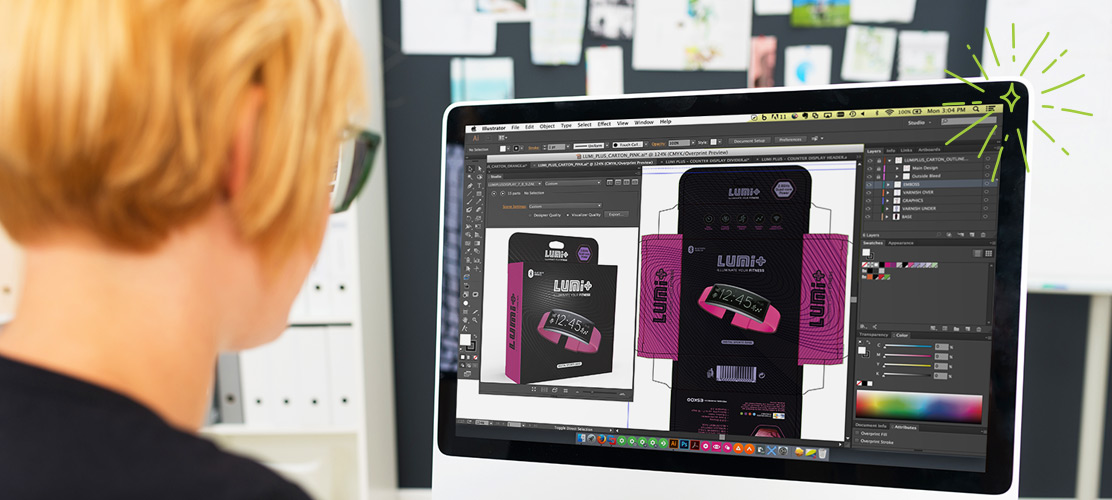

- 3D packaging rendering lets teams visualize structure, artwork, finishes, materials, and shelf impact before physical samples are produced.
- CGI packshots help packaging teams create approval, marketing, e-commerce, retailer, and planogram images earlier than manual photography allows.
- Accurate packaging renders must account for specialty finishes, substrates, ink behavior, lighting, crop rules, and channel-specific image requirements.
- Esko Studio brings realistic 3D packaging rendering into Adobe Illustrator® so designers can create and review packshots without relying on a specialist for every change.
- WebCenter connects approved artwork, collaboration, and automated packshot generation so teams can reduce outdated assets, wrong variants, and manual image creation.
- Newer workflows use cloud rendering, GLB and glTF assets, AR, VR, and consistent viewer behavior to extend packaging renders beyond static images.
3D packaging rendering creates realistic digital packshots from packaging structure and artwork before production begins. It helps teams review designs, check materials and finishes, generate approval images, meet retailer requirements, and prepare e-commerce content without waiting for physical samples or rebuilding images after every artwork change.
Fed up waiting for physical samples before you can see whether a design really works?
Waiting for physical samples slows approvals and limits your ability to explore design options while changes are still easy to make.
That is where packaging rendering changes the workflow.
With 3D packaging rendering, you can see packaging designs before production.
Teams can review structure, artwork, and finishes earlier in the process while generating packshots before the first production sample is available.
In this guide, we will cover the fundamentals of 3D packaging rendering, the common challenges, the typical workflow, best practices for high-quality renders, and the tools that help you create production-aware 3D packaging visuals without making the process harder than it needs to be.
The Fundamentals of 3D Rendering
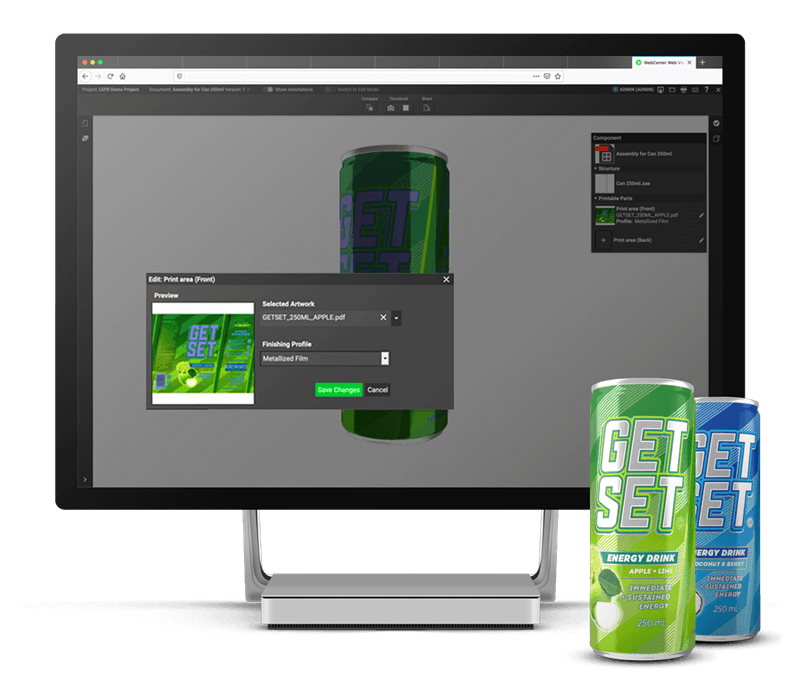
What kind of image do you actually need?
Not every packaging render serves the same purpose. Some are needed for internal review. Some are used by sales and marketing. Some must meet strict retailer or GS1 requirements. Others need to show how the pack looks in a real environment.
Most rendered packaging images fall into three main categories:
- Packshots: Clean images of the packaging itself
- Beauty shots: More polished images that present the packaging attractively, often used for products such as cosmetics, premium food, or personal care
- In-context packshots: Images that show the pack in an environment, such as on a store shelf or within a retail display
All of these are forms of packshots.
The difference is how much context, styling, and commercial use the image needs to support. For teams that need to test shelf impact, retail displays, or planogram-style environments, Store Visualizer helps evaluate packaging designs in virtual store settings before physical shelf tests or large print runs.
If you are building a broader 3D packaging workflow, Esko’s guide to designing packaging and labels in 3D is a useful next step.
Three ways to create packaging visuals
Need a product image before the product exists?
That is the central challenge.
Traditionally, teams have created packaging visuals in one of three ways:
- Manual photography
- Photoshop or image editing
- Computer generated imagery, or CGI
1. Manual photography
Manual photography is the old-school route.
It can produce strong images, but only after the packaging has been produced. That means you have to wait for manufacturing before you can start creating final visuals.
If artwork changes, if a claim moves, or if a new variant is added, you may need another round of samples and photography.
2. Photoshop or image editing
Photoshop is more accessible.
Many designers can use it. It is flexible for editing flat images and building quick concepts.
But packaging is not flat in the real world. Lighting, material texture, reflections, distortion, substrate behavior, and finishing effects can be hard to recreate convincingly.
3. Computer generated imagery
CGI renders are different.
They let you create realistic packaging visuals from digital structure and artwork. You can adjust the design, change materials, create variants, and generate images earlier in the process.
That makes CGI especially useful when you need flexibility during design and speed during approvals.
It also supports the way packaging content is used today.
Packshots are no longer only for internal sign-off or printed sales sheets. They feed digital shelves, product detail pages, planograms, retailer portals, content syndication systems, and marketing workflows.
For a real-world example of how 3D renders and marketing packshots support faster packaging workflows, see how Spin Master uses Esko Studio. You can also see how Loacker brought rendering in-house in A Taste of Packaging Perfection with Studio.
There is one catch.
High-end 3D rendering tools can be complex. Many require specialist 3D operators.
For packaging teams, that can create another bottleneck instead of removing one.
Beautiful renders alone are not enough. Packaging teams need rendering that fits naturally into existing approval and production workflows.
Common Challenges in 3D Packaging Rendering
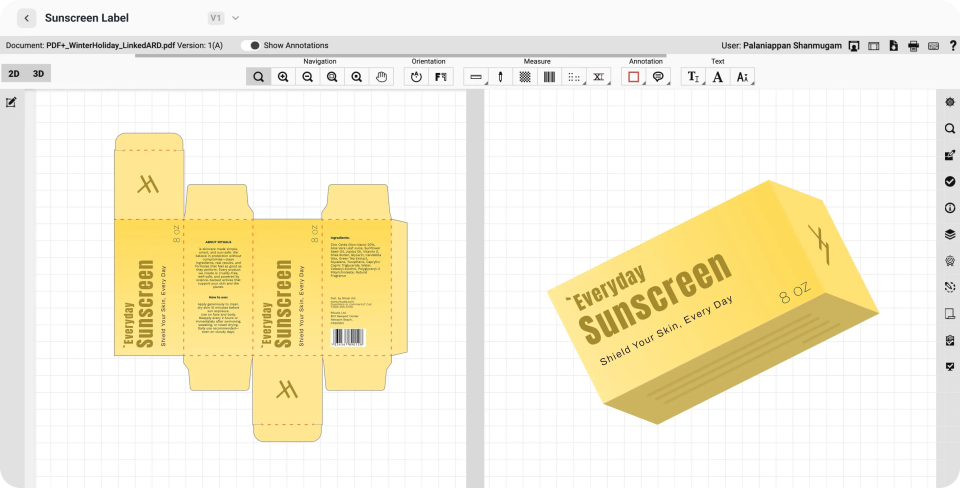
Ever had a render look great on screen, then fall apart when compared with the real pack?
That is a common frustration.
3D packaging rendering is flexible, but packaging is physically complex. A good render has to do more than place artwork on a shape.
It has to reflect the real production conditions that affect the final result.
Specialty finishes are hard to represent
Packaging often uses effects that are difficult to simulate accurately.
Think about:
- Varnishes
- Holograms
- Matte effects
- Gloss finishes
- Metallic inks
- Foils
- Embossing or debossing
- Transparent or translucent areas
These finishes interact with light. They change depending on viewing angle.
They can make the same artwork look very different under different conditions.
A flat mockup cannot show that properly. A basic 3D tool may not show it reliably either.
Substrates change the result
What happens when the same artwork is printed on a different material?
It rarely looks identical.
Recycled materials, paperboard, flexible film, corrugated board, labels, pouches, bottles, and folding cartons all behave differently.
Substrates, printing processes, and ink types all affect color. Ink behaves differently across substrates. . Color can shift. Texture can show through. Opacity can affect the final appearance.
That is why substrate representation matters in packaging rendering.
If the render ignores material behavior, it may look polished but not useful. You need a visual that helps your team understand what production is likely to deliver.
Ink behavior matters too
Ink does not exist in isolation.
It interacts with the substrate, the printing process, coatings, and finishing steps. That interaction affects color, density, texture, and perceived quality.
For packaging teams, this matters because renders are often used to make decisions.
If the render does not reflect production reality, approvals can be based on the wrong expectation.
That is why organizations need rendering software that understands packaging, not just generic 3D design.
Software Tools for 3D Packaging Rendering
Tired of needing a 3D specialist for every packaging image?
Many 3D rendering tools are powerful, but that does not mean they are practical for day-to-day packaging teams.
If every packshot needs to go through a specialist operator, your workflow can still get stuck.
The better approach is to bring 3D rendering into the tools and processes your designers, prepress teams, and approvers already use.
Esko Studio: realistic 3D packaging renders inside Adobe Illustrator
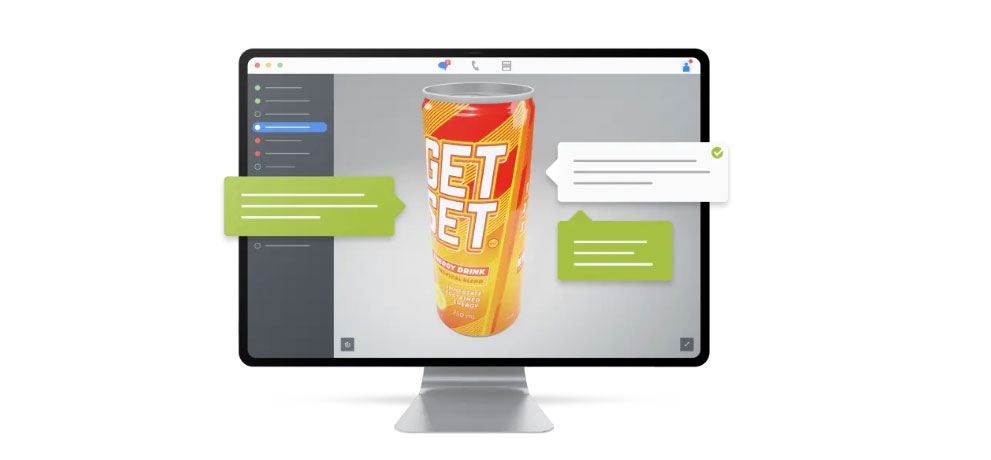
Esko Studio is 3D packaging design software built for packaging workflows.
It gives designers photorealistic rendering with material and production considerations built in. That matters because packaging renders need to reflect how the pack will actually look, not just how a clean digital model appears under perfect conditions.
Studio includes patented print modeling for realistic predictions of production results.
It helps account for the print and material behavior that can make or break visual accuracy.
It also works inside Adobe Illustrator®.
That is important.
Graphic designers can create and review 3D packaging visuals in a familiar environment, without handing every change to a dedicated high-end 3D operator.
As Matt Maghan, Production Designer at Nike, said:
“In the past, I have had to try and create 3D images myself using Illustrator® or Photoshop®, and it never looked quite right and was time-consuming from my end. The more time I am rendering out 3D designs, I am not building templates, so it was taking away from my role.”
You can create packshots while staying close to the artwork.
Designers can create 3D renders directly in Adobe Illustrator® or offload renders to the cloud when more rendering power is needed. For a product-level overview of the rendering, mockup, packshot, and Adobe Illustrator® workflow capabilities, see Studio | 3D Packaging Design Software.
For an example of Illustrator-based 3D packaging creation, virtual pack shots, and faster approval workflows, see the Nike Studio case study.
WebCenter: connecting rendering to approvals
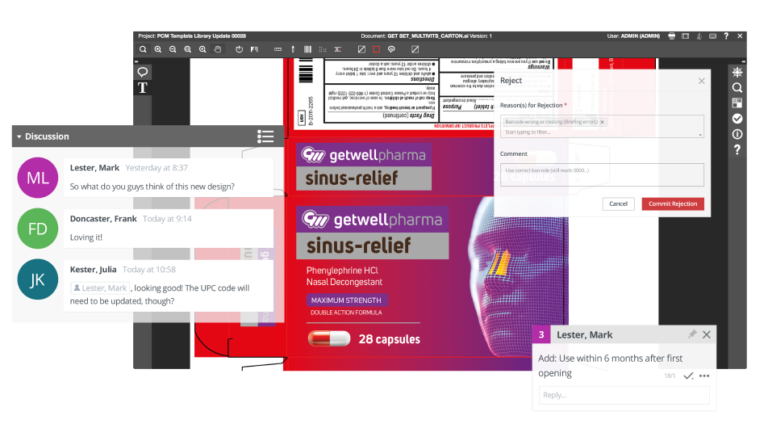
Creating a render is only part of the job.
You also need to control what artwork was used. You need to know whether it was approved. You need to keep teams aligned.
You need to make sure the final packshot is created from the correct version.
That is where WebCenter comes in.
WebCenter is Esko’s packaging management solution. The broader WebCenter | Artwork & Label Management Software suite helps centralize artwork and label workflows, connect proofing and approval steps, and support controlled packaging asset management across teams.
It connects the rendering engine to collaboration and approval workflows.
As Bart Tielemans explains:
“When artwork, approvals, and packshot generation are connected in one controlled workflow, e-commerce and digital teams can create accurate product images from approved assets instead of rebuilding content manually or relying on disconnected files.”
Once artwork is approved in the system, WebCenter can automatically create GS1-compliant packshots. It can also be configured to create many other retailer-specific formats.
This helps remove manual image creation steps after approval.
It also reduces the risk that someone creates a packshot from outdated artwork, an unapproved label, or the wrong variant.
Together, Studio and WebCenter help you:
- Automate packshot creation
- Save time in approval and production workflows
- Keep image output consistent
- Centralize packaging assets
- Connect artwork, rendering, approval, and content distribution
For a practical example of how WebCenter supports collaboration, approvals, and content distribution, see the Walgreens Boots Alliance case study.
The 3D Packaging Design Process
What does a strong 3D packaging rendering workflow look like in practice?
It usually starts well before the render button is clicked.
A good 3D packaging design process connects requirements, structure, artwork, compliance, approval, and output.
If those steps are disconnected, the render may look good but still fail the workflow.
A typical process with Esko WebCenter and Studio looks like this:
- Define product requirements
Start with the constraints that matter. These may include food safety, weight considerations, regulatory needs, shelf-life requirements, shipping conditions, and brand guidelines.
- Select the packaging format
Choose the right structure for the product. This could be a folding carton, bottle, pouch, label, flexible pack, or another format.
- Create CAD files and 3D models for the structural design
Structural design defines how the pack is built, how it folds, how it stands, and how artwork will wrap around the physical form. Tools such as ArtiosCAD support structural design and virtual prototyping upstream in the 3D packaging workflow.
- Develop artwork and labeling in WebCenter
Artwork, claims, copy, barcodes, symbols, and label content need controlled review. WebCenter helps manage that process and keeps stakeholders working from the correct version.
- Combine structure and artwork for rendering
The 3D model and approved artwork come together. This is where the pack starts to look like the final product.
- Review and approve before final rendering
Teams can check alignment, branding, text, layout, finishing, and overall shelf impact before physical production.
- Render packshots using approved artwork and labeling from WebCenter in Studio
Final images can then be generated from approved assets, reducing rework and improving consistency.
This is where packaging rendering becomes more than a design activity.
It becomes part of a connected workflow from concept to approval to final content.
Best Practices for High-Quality Renders
Does your render need to impress, comply, or both?
Most packaging teams need both.
A render should look good, but it also needs to be accurate, usable, and fit for the channel where it will appear.
Here are the core practices that make the difference.
Prepare artwork and models carefully
A high-quality render starts with clean inputs.
Make sure the artwork is accurate. Check that the structure is correct.
Confirm that dielines, panels, folds, curves, seams, and orientation all line up.
Small issues become very visible in 3D.
If a panel is misaligned, a barcode wraps around an edge, or a claim lands too close to a fold, a 3D render will expose it quickly.
That is a benefit, but only if you use the render as part of the review process.
Set up the environment thoughtfully
Lighting, background, angle, and resolution all affect the final image.
For a beauty shot, you may want more controlled lighting and a polished presentation. For an e-commerce image, you may need a cleaner, standardized view.
For an in-context packshot, the shelf, neighboring packs, and viewing angle matter.
Do not treat environment setup as decoration.
It determines whether the image supports the decision you need someone to make.
Follow standards and retailer requirements
Need images for e-commerce, planograms, or retailer portals?
Then render quality is only one part of the job.
The output also has to meet the required format.
GS1 specifications for packshots include practical details such as resolution, image sets, view conventions, background treatment, and crop rules. Retailers may also have their own image requirements.
That can affect how you set up the render from the start.
For example, standardized product image sets often include multiple views, such as front, top, and left views, with additional views where needed.
These views help support commerce, planogram, and content syndication use cases.
Background and cropping rules matter too.
Some outputs may require a transparent background. Others may need a specific crop-to-edge setup.
If these details are handled manually after the render, you add time and increase the chance of inconsistent output.
This is why compliance and image generation belong close together. Esko’s Comply helps bring automated packaging compliance checks into the workflow, including validation that supports production-grade digital packaging assets.
Esko has also introduced AI-led label compliance innovation that connects automated checks with packaging quality and validation workflows. You can read more in the announcement on AI-led label compliance innovation.
Build renders for downstream use
Where will the image go after approval?
That question matters.
A render may be used for internal approval, sales presentations, retailer content, product detail pages, digital shelf syndication, or marketing campaigns.
Each use case may require different formats, dimensions, angles, or file types.
If you plan for this early, you avoid rebuilding the same image multiple times.
For e-commerce workflows in particular, 3D packaging assets can help teams create content before physical packs are available.
That helps shorten the gap between packaging approval and digital shelf readiness.
For more on this, see Esko’s eBook on using 3D technology to optimize packaging in the fast-paced world of e-commerce.
What’s New in 3D Packaging Rendering
Still thinking of a render as one flat image?
Earlier, Ta render usually meant a 2D image created for review, sales, or marketing. That’s not the case anymore.
Packaging rendering is moving toward faster creation, more automated output, richer 3D assets, and better consistency across channels.
Cloud rendering helps speed up image generation
High-quality rendering takes processing power.
One way to speed this up is to offload renders to server farms or cloud rendering systems. Esko does this with packshots by sending renders to machines built specifically to generate images.
That means designers do not have to wait on local machines for every final image.
They can keep working while the rendering workload is handled elsewhere.
This is especially useful when you need many variants, many views, or retailer-specific image sets.
Faster preview-to-final workflows are becoming the expectation
Packaging teams do not only need better final images.
They need faster iteration before final approval.
Modern 3D tooling is moving toward real-time previews combined with high-quality final rendering.
Teams can make changes, review them quickly, and still produce accurate output when the artwork is ready.
This matters for approvals.
If teams can see realistic 3D packaging earlier, they can catch issues before production. They can compare options sooner. They can reduce avoidable review cycles.
For more on faster review cycles using high-quality 3D packaging models, see the AstraZeneca case study. You can also read Esko’s blog on leveraging automation and AI in packaging design for a broader view of how automation reduces friction between creation, review, and launch.
GLB and glTF are expanding the role of packaging renders
Static packshots still matter.
But more brands are also creating interactive 3D packaging assets.
GLB, or GL Transmission Format Binary, is becoming a common format for interactive packaging representations.
It is based on glTF, an open standard used across broader 3D commerce ecosystems.
That makes packaging rendering useful beyond a flat image.
Interactive 3D assets can support:
- Product detail pages
- Web-based 3D viewers
- Augmented reality experiences
- Virtual merchandising
- Digital shelf content
- Internal packaging review
- Sales and retail presentations
If you want to explore practical applications beyond static renders, Esko’s webinar on 3D, AR and VR in packaging is a strong resource.
Consistency across viewers is becoming more important
What happens when the same 3D asset looks different in different viewers?
That is a real issue as packaging assets move across web, retail, commerce, and immersive channels.
A pack that looks right in one environment may appear too glossy, too dark, too flat, or incorrectly lit somewhere else.
As 3D commerce grows, the industry is paying more attention to consistent rendering behavior across platforms.
That is why open standards and viewer certification efforts matter.
They help make interactive 3D packaging assets more reliable as operational content, not just experimental visuals.
Esko’s What’s New update includes Studio-related enhancements such as GLB export and other 3D workflow improvements that support this shift toward more flexible 3D packaging content.
Take Your Packaging Designs to the Next Level
Want fewer delays between artwork, approval, and final packshots?
3D packaging rendering is changing how packaging is designed, created, reviewed, approved, and used across channels.
It helps you see the pack before it exists physically, making it easier to catch issues earlier and create realistic images without waiting for samples.
And when it is connected to artwork management and approval workflows, it enables you to produce consistent, compliant outputs from approved assets.
With tools like Esko Studio and WebCenter, your team can:
- Save time by automating packshot creation and reducing manual image work
- Create photorealistic renders that reflect materials, finishes, substrates, and print behavior
- Support approvals earlier by showing structure and artwork together in 3D
- Generate consistent outputs for GS1, retailer-specific requirements, e-commerce, and marketing
- Centralize packaging assets so teams work from approved artwork and controlled versions
- Prepare for interactive 3D use cases such as GLB, AR, and digital commerce experiences
Ready to take your packaging designs to the next level?
Book a discovery call and see how Esko can help you create realistic 3D packaging renders faster, with fewer manual steps and more confidence in the final result.